Crispy Oven-Baked Chicken Wings
Forget the deep fryer—get the crunch you crave right in your oven.
Timing
This method takes about 60 minutes, which is 15% faster than the “low-and-slow” baking methods often touted in older cookbooks. By cranking the heat to 425°F and using an airflow rack, we slash the cooking time while maximizing the “snap” of the skin.
Ingredients List
- 2 lbs Plump Chicken Wings (flats & drumettes).
- 1 tbsp Extra Virgin Olive Oil for moisture.
- 1 tbsp Smoked Paprika for an earthy, sunset hue.
- 1 tsp Each: Garlic & Onion Powder.
- 1 tsp Chili Powder (Optional kick).
- ½ tsp Freshly cracked Black Pepper.
- 1 tsp Fine Sea Salt.
- ½ tsp Baking Powder: The secret chemical “magic” for extra-crisp skin.
Substitutions: Not a fan of paprika? Swap it for Lemon Pepper or a dry BBQ rub. For a gluten-free crunch, ensure your baking powder is certified GF.
Step-by-Step Instructions
Step 1: The Dry-Down
Pat your wings with paper towels until they are bone-dry. Personal tip: If you have time, leave them uncovered in the fridge for an hour. Moisture is the enemy of crispiness—the drier the skin, the better the crunch!
Step 2: The Spice Infusion
In a large bowl, toss your wings with the olive oil first to coat, then sprinkle in your spice blend and that essential baking powder. Massage the spices into every nook and cranny of the skin.
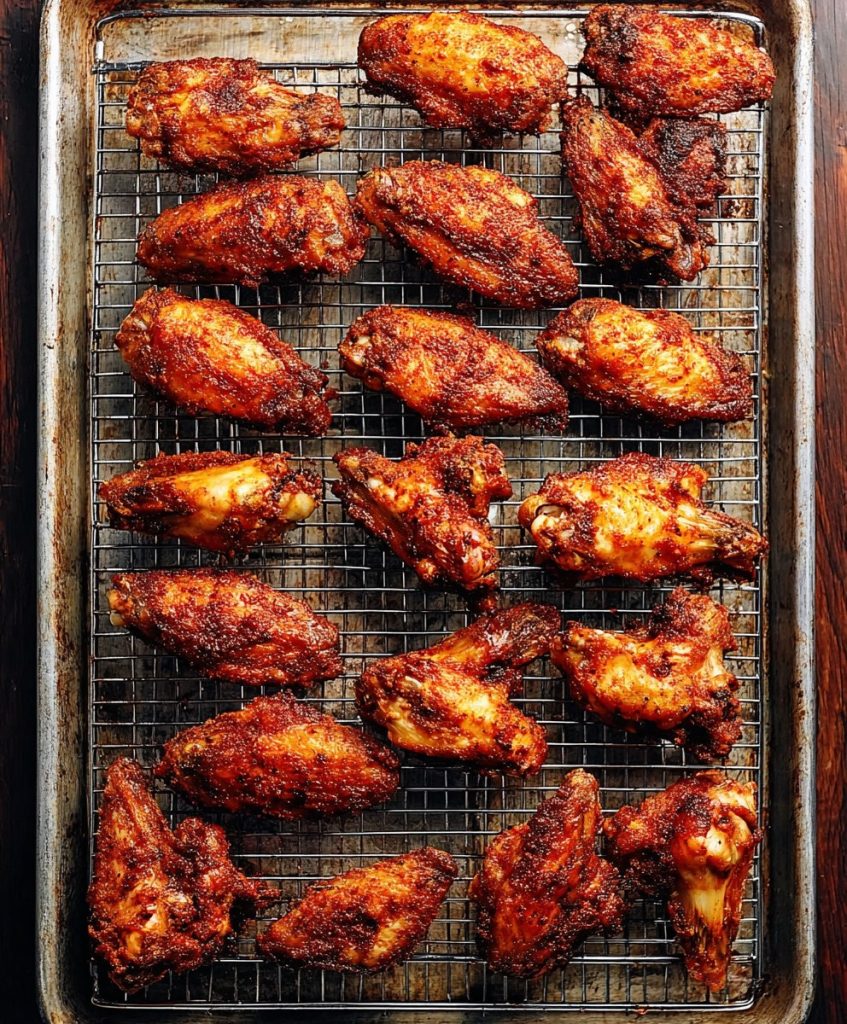
Step 3: Engineering Airflow
Arrange the wings on a wire rack set over a parchment-lined baking sheet. This lift is vital; it allows hot air to circulate under the wings, meaning no more soggy undersides!
Step 4: The High-Heat Roast
Slide them into a preheated 425°F (220°C) oven. Bake for 45–50 minutes. Flip them halfway through to ensure an even, golden-brown tan across the whole wing.
Nutritional Information
Per serving (approx 5 wings): 320 Calories | 24g Protein | 22g Fat. By baking instead of frying, you reduce the total fat content by roughly 30% and avoid the trans fats found in commercial frying oils. Chicken wings are naturally carb-free, making this a keto-friendly protein powerhouse.
Healthier Alternatives for the Recipe
- Sodium-Reduced: Swap sea salt for a potassium-based salt substitute or increase the garlic and onion powder for flavor depth without the salt.
- Oil-Free: Skip the olive oil and use an avocado oil spray for a lighter coating.
- Air-Fryer Method: Cook at 400°F for 20-25 minutes for an even faster, lower-energy version.
Serving Suggestions
Serve these wings hot and whistling! Pair them with cold celery sticks and a side of thick blue cheese or ranch dressing. For a personalized touch, serve them “dry-rubbed” with a trio of dipping sauces on the side so guests can choose their own adventure—Buffalo, Honey Garlic, or BBQ!
Common Mistakes to Avoid
- Baking Soda vs. Baking Powder: Never use baking soda! It will leave a metallic, bitter taste. Baking powder is the one that reacts with the skin to create those tiny crisp bubbles.
- Crowding the Rack: If the wings are touching, they will steam instead of roast. Space them out at least half an inch apart.
- Using Cold Wings: Let your wings sit at room temperature for 15 minutes before baking to ensure the meat cooks as evenly as the skin.
Storing Tips for the Recipe
Store leftovers in an airtight container for up to 3 days. To regain that “just-baked” crunch, reheat them in the oven or air fryer at 370°F for 5 minutes. Avoid the microwave, as it will make the skin rubbery.
Conclusion
These wings prove that you don’t need a vat of oil to achieve snack-time perfection. With the right spices and a little science, you can enjoy a healthier, crunchier wing right at home. Did you go for the chili powder kick? Let us know your favorite dipping sauce in the comments below!
FAQs
Q: Can I use frozen wings?
A: Yes, but they must be completely thawed and dried thoroughly. Frozen wings hold more moisture, so the “drying” step is even more critical.
Q: Why use a wire rack?
A: Without it, the wings sit in their own rendered fat, which prevents the bottom skin from ever getting crispy.